28 February, 2010

Let the Banjar-makin' begin!

What have I gotten myself into?
our skins, ready to be cut out

Way back last summer, before I even arrived at the Folk School, I got to pick out my three "silver bullet" classes and send them in to Kate, our registrar, who at that point I didn't even know. What must she have thought of me, this mysterious soon-to-be-host who picked out glass beads, a sheep to shawl class, and make your own fretless mountain banjo from an honest to god freshly skinned groundhog hide?

I'm so lucky to be marrying a man who can play just about any instrument he chooses to pick up, and even luckier that one of his favorites to pick up is the banjo. My grandpa played banjo, loudly, crowing out "You Are My Sunshine" to the front porches of his upstate New York neighborhood. My step-Dad rocked the banjo all through college in a South Carolina bluegrass band, and now he drives long distances to meet back up with those same guys and have jam weekends. A banjo being played clawhammer style, especially on an old time tune in a minor key, has got to be one of my favorite sounds in the world. So of course I wanted to be in John Huron's banjo making class.

Kenny's wedding banjo: step 1

The class starts tonight, and so far we've picked out our wood blanks (I chose walnut with a cherry center ring) and learned how to skin a groundhog. The closeups are on Flickr here and here, but I wanted to keep the front page of the blog relatively guts-free, so click on over if you're fascinated (I am!).

The little bit of knitting I have managed to eke out...

... amongst the quilting and the felting and the endless hand sewing going on around here, I managed to cast on for the long pined for mate of my sampler mitten, made way back in Martha Owen's Fair Isle class. (In my excitement to finish the first one in time for the student exhibit, I cast off the thumb at least a half inch too short, so technically the first one isn't done, either. But at least now there are (almost) two of them.

Mitten gets a mate, finally.

26 February, 2010

My week in Blacksmithing has come to an end.

My haul at the student exhibit

When I first arrived at the Folk School I was excited about trying my hand at the forge, but then I promptly came down with a sinus infection and it seemed like a bad idea to be in the middle of a soot and smoke cloud for a week. All of a sudden months had gone by, and I realized that if I wanted to try, I'd better get in a class quick. Luckily for me there were several spots open in Susan Hutchinson's class, and she is awesome! It turns out I really, really liked being sooty all week. (I also learned that I really like operating a drill press). On the pro side of blacksmithing: I made so many things that I've wanted for a long time, and also my grey work pants and I have bonded. On the con side: I see so much coal when I blow my nose that I wonder if I'll end up with black lung. Also, I burned my hand a few times, but that's no big deal.

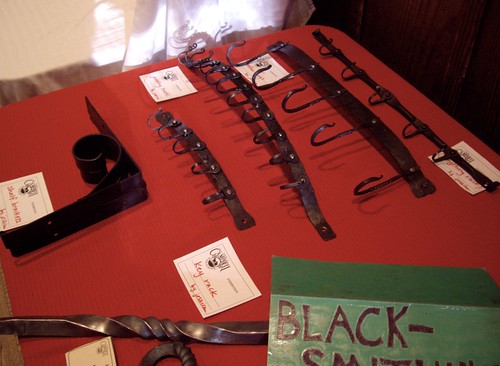
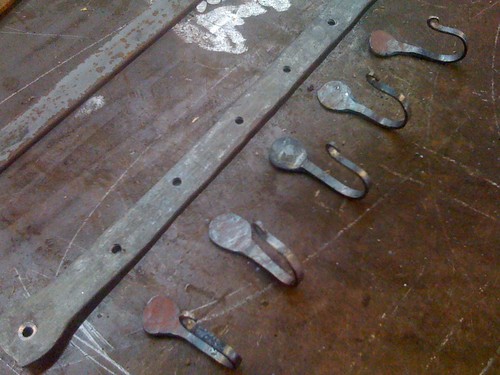
Here's my end-of-the-week haul!

We all made a sweet pair of barbecue skewers as our 1st night intro project:
Barbeque skewers
Barbeque skewers

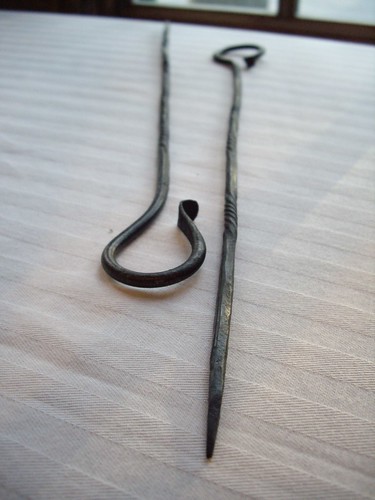
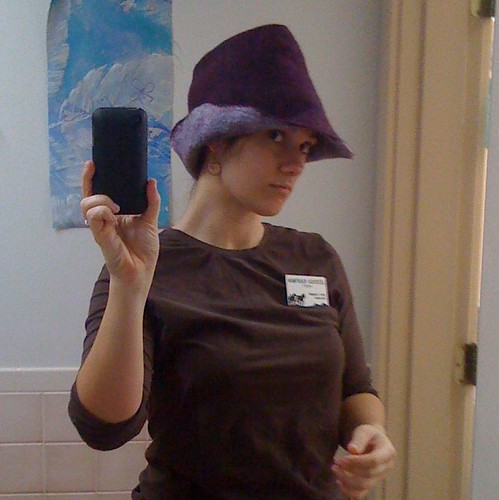
Then I moved on to racks of hooks. This was my main goal in taking the class. My FMIL (future mother-in-law) Patty has an awesome iron rack of hooks on which all her necklaces are hung. I'll fess up to having coveted it for years. Rather than continue to stroke it every Thanksgiving break, I made my own, with twelve hooks on it. (In the photo at the top of this entry, it's the curvy rack with, well, the twelve hooks). Then I made a mini version for our keys, to be hung near the front door. Here's the key rack, ready for assembly:
Key rack, ready to be riveted together

And here it is, all neatly put together and oiled.
Key rack, assembled and cleaned and oiled
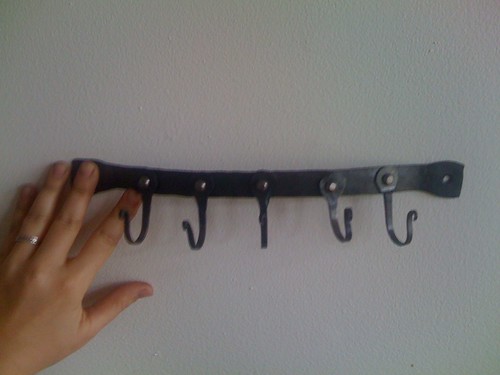
(excuse the iPhone pic).

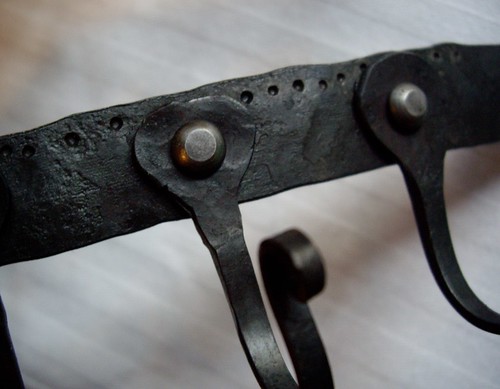
A detail that I really like from the jewelry rack:
Jewelry rack, detail

Here's the next rack I made, with bigger hooks, intended for our coffee cups and to be hung near the kettle.
coffee mug rack!
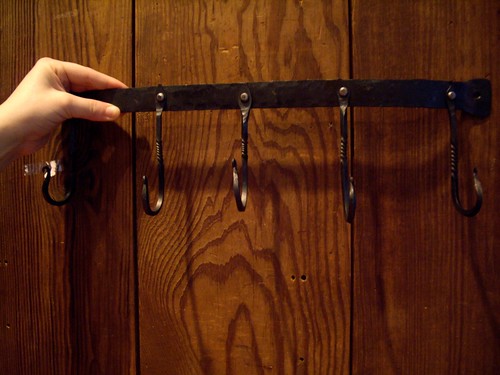
I really love that it curves out from the wall. I can't wait to see what our mugs look like on it!

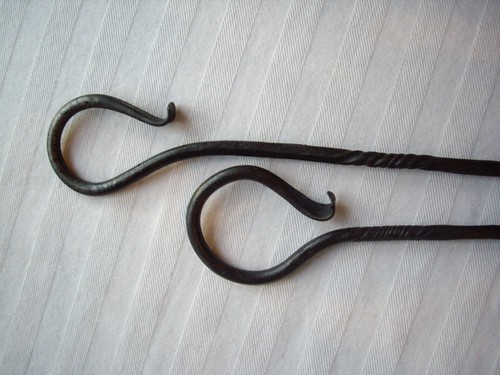
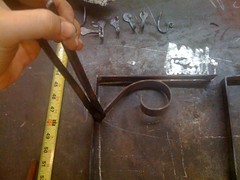
I ended up making another rack late last night, because I had so many extra hooks left over. (I also really liked making hooks. Who doesn't?) The whole week I had been hammering my steel by hand, as well as building a coal-burning fire in my forge by hand. Susan and a few of the more experienced students in class had fired up a propane forge and were also using a gigantic, scary-looking hammering machine (I'm sorry I don't know what it actually is called), and they were getting their work done super fast. So I tried making this last rack in the propane forge and hammering it with the hydraulic machine. Here's the difference:
on the left: hand hammered rack. On the right: hammered with the pneumatic (?) air compression hammer thingy.
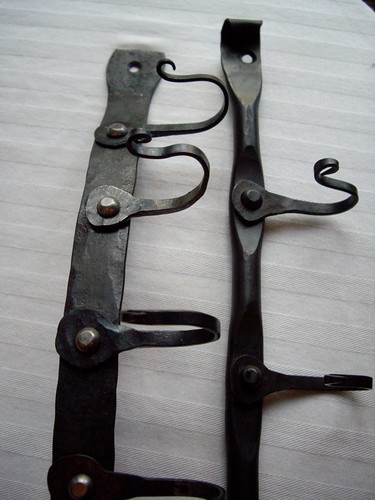
(hand hammered is on the left, machined is on the right).

One of the less obvious benefits to using the propane forge is that no matter how long you keep your steel in the fire, it will not burn. Somehow the forge only gets hot enough to make your piece glow, but it will never spark (bad) or burn (very very bad). Huh. So yeah, there are some burn marks on all my other pieces. But I also really like the hammer marks that a human makes. They're both good methods, and I'm glad I learned both.

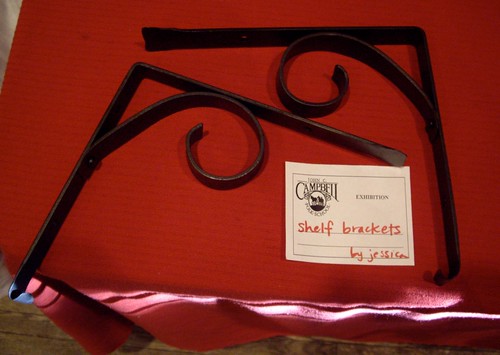
The very last project I completed was a pair of brackets for a shelf. This was tough because a) it was the biggest steel I had used and b) I needed them to match almost perfectly. Here they are, in progress and then at the exhibit:
Piecing together my shelf brackets
Finished wall brackets

So, any blacksmith who is reading this has probably already said to themselves, "oh, she totally cheated. Those (small) hooks are horseshoe nails!" And it is true. For the small hooks that I used on three of the racks, I used horseshoe nails instead of cutting round or square stock (long bars of metal). This, I have heard, is blacksmith cheating. However, my racks are so pleasing that I do not mind at all having "cheated." I mean, I still had to heat them correctly and pound out the heads and curl the tails and shape the hooks! And drill the holes (squee!). It was a lot of work for a beginner.
Horseshoe nail, before and after
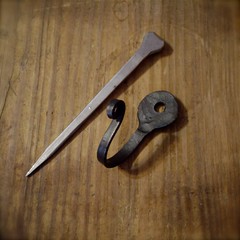
(Horseshoe nail as god intended, and after being manipulated by a cheating cheater).

All in all I'm super glad I got to take blacksmithing, and am glad I took it from Susan. By the end of the week I was starting to see how addicting it could get. I do miss my nice soft yarns, though. And fabric. It's hard to burn yourself on yarn.

25 February, 2010

Boots in progress

IMG_0088

Remember these boots from last month? Here's a WIP shot of how they're coming along...

Felted boots: during.

Eventually, the buttons are going to run all the way up the outside of each boot. It's an awful lot of hand sewing, and I have so many other things to work on that I'm rarely motivated to sit down with needle and thread and a lap full of wool. But I guess I'd better finish them soon, or it'll be way too warm to wear them!

Did I tell you about crochet class?

Crochet display 2/19/10

In high school, I definitely thought crochet kicked knitting's butt. I made my brother Aaron a series of ill-fitting crocheted beanies (too thick, too short, rather like a puffy yarmulke) and my Aunt Glo and rather terrifying scarf that I'd rather not even describe here. Then college hit and my dorm buddies reminded me how to execute a few basic knitting skills, and my costume teacher Martha lent me a set of double points and I never looked back. My crochet skills were only the tiniest bit revived when I co-taught the Montessori crafts camp with Cindy, a famous crocheter (I just love those two words together).

So when I had the chance to take a crochet class aimed partly at knitters who wanted to branch out, I was very excited. Deb, our teacher, had a slew of project choices for us, each of which would help us get the hang of certain skills. Our first project that we all did together was a felted box. (Hey, all this time I've been swearing that Lamb's Pride is the best basic worsted weight yarn for felting, and it turns out, it's actually Cascade 220. Huh!)
Crochet display 2/19/10

After boxes, we branched out into washcloths (mine is a shell stitch):
My organic cotton washcloth, crocheted in a shell stitch pattern

and granny squares (I didn't spend much time on mine because I want to do one of those amazingly humongous granny square blankets made with some yarn that has long color repeats, like Noro or Mini Mochi or Tie-Dye).
My 1st granny square!

Then I went stash diving and came up with the perfect half-skein of gorgeous Brooks' Farm Primero, 100% kid mohair, that Meg sold me at the yarn swap last year. This was the perfect project: done by the end of the class, used up almost exactly the amount of yarn that I had, required no counting or pre-planning. Done. I love it!
I can crochet! (Again!)

Crochet mini-shawl

22 February, 2010

Darn!

Double darn!

Holes.

I guess this is the Universe's way of letting me know that while blacksmithing is nice and all, I should be working on learning how to darn socks. Sigh...

I'm off to check the Ravelry forums for helpful hints and/or video tutorials.

21 February, 2010

A very overdue post about my Felting Class: how to make a felt hat from roving

IMG_0087

Several weeks ago I was lucky enough to score a spot in Carla Owen's class on felt-making, using resists to felt things in the round. In the back of the room there were two tables covered in gigantic balls of wool (wound out of long strips of merino wool, the primary wool we'd be using that week). Under the table were boxes and boxes of domestic breeds, all in natural un-dyed colors. Heaven!

Our first project was a hat. We all started with the same exact size and shape. The size was determined by the resist, which is made out of that kind of thick yet flexible material you might cover chairs in a diner with. carla knew the shrinkage rate for merino (40%), so had made a resist that was 40% bigger than our actual hat was supposed to end up. Of course, since it's felt we're making, lots of different sized hats could come from the same size resist, because if you have a bigger head you could stop felting earlier, and if you needed it smaller you could just keep going. It was so interesting to see all the different types of hats that the class made, just from felting at different rates and on different areas of our hats! Several friends of mine have asked how I made the hat, so Ashley and Jenna, this one's for you!

So how exactly do you go about actually making a resist felted object? First of all, we worked on screens. Just a roll of nylon screen, the type you'd use for a window. We first placed a paper pattern that was a little bit wider than the resist on the table and put the screen over it, and then laid out three layers of roving, in loose tufts, with the first layer laid out horizontally, the next layer with the fibers running vertically, and the final layer horizontally again. Then we put the resist down on top of the wool, and did another three layers just like the first, but on top of the resist. Because the paper pattern we used was slightly wider than the resist, the layers of wool overlapped at the edges (except the bottom edge, of course, which is the opening), and we encouraged that overlapping by using our fingertips to splash a little water on the edges and sort of glue them in place so that they curved around each other.

IMG_0075

Once all the layers are in place, we put another piece of screen on top and sort of basted them together with a running stitch of twine, stitching as close to the wool as possible. This proved to be very helpful, as the secureness of the screen sandwich helped all the wool stay in place while we rubbed it like crazy with soapy hands. (This class was very exfoliated by the end of the first day). Also, as you start to felt the hat, the edges will start to pull away from the stitched outline you made, which shows you just how far you've come.

Felting step one: sprinkle your project with water. Step two: rub the screen with a bar of natural, old fashioned soap. Steps three through three hunded and three: agitate. Rub up and down, side to side, ball that sucker up (once it's all started turning into felt, of course) and squoosh the hell out of it. Keep on agitating it until you feel like it's pretty solid, and then cut your stitching off the screens, toss the screens aside, and reach your hands into the hat and work just the seams. They are delicate! But they get nice and strong really fast once you start working them from inside and out at the same time. Here's a picture of my hat, with the resist still inside, before I started working the seams.
IMG_0077
Once the seam is strong all the way around, you're done with the resist! Now it's time to put it on your head and take a silly "before" picture, so you can remember just how big and floppy it once was.

IMG_0079
IMG_0078

I'm so proud of my hat. It's exactly what I was after, in size, color, shape, and everything. I wore it in my Morris Dance class this weekend and it was just perfect. Total success!
IMG_0082
Later in Carla's class I attempted to make an oversized "mountaineer" hat, like a moonshiner's hat, from a pattern left behind by legendary Canadian host and blacksmith Matt Jenkins. He even wrote on the pattern, "Matt's Big-ass Hat". I felted it too quickly in width and not fast enough in length, so it's crazy tall. Fortunately, Conway my co-host tried it on and it looks perfect on him! He wore it during our Morris presentation and it looked so nice, I said he could keep it. Happy trails, big-ass hat!

02 February, 2010

Our stomping gets featured on the Folk School Blog


Here is a nifty little write-up from recent birthday girl Emolyn Liden who co-taught the weekend clogging class a few weekends ago.

Suh-weet!

I'm on Flickr a lot.

Jessica K.. Get yours at bighugelabs.com/flickr