
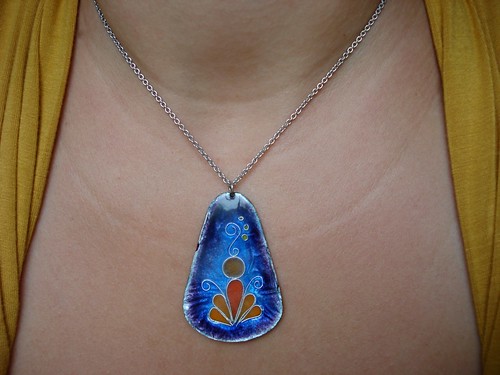
It was my weekend off and between all the driving and the fun and the dancing and the crashing on Sarah's futon, I neglected to make a post about my very special first class, which I took last week, which was Cloisonne. Like from the root word of cloister, meaning to separate into little sections, this is a type of enameling where you bend silver wires into shapes and fill in and around them with wet glass powders in various shades and opacities.
I apologize for not having taken pictures of each of these steps. I like to work fast, and I only settle down and remember the camera when I've exhausted myself by getting three steps ahead of everyone else in the class. Which is when I realized I've made some horrible mistake and have to start over. Sigh. Anyway:
Step 1: pick your piece of metal (we used copper), clean it, stone down the rough edges, and pierce a hole into it if you desire.
Step 2: sift enamel (glass powder) onto both the front and the back (counter enameling) so that the piece doesn't warp, and fire it for a short while in the kiln. (If people won't see the back, you can use an ugly old mix of leftover enamels, but if it's a pendant or earrings you get to pick a pretty color to counter with.)
Step 3: If you're going to use translucent enamels, it looks better if you then attach a piece of real silver foil (like aluminum foil but much MUCH thinner and much MUCH more annoying to work with) and fire the piece so that the foil sticks down to the enamel on the front. No need to waste foil on the back of your piece, unless you truly want to work up something pretty on both sides.
Step 4: Bend up some wires into a shape approximating the outline of your design and then attempt to place them exactly where you want them on a slick-as-glass surface using a watery "glue" (ha!) that will only become sticky once you heat it up. But when you heat it the itty bitty silver wires can slip, or fall over on their sides, or just mysteriously migrate across the front of your piece. IT'S A FREAKING JOY. No, seriously, I think I may have ground my teeth into glass powder as a result of this process. If my piece looks sort of mottled, that's why. IT SUCKED. KlyrFire, I hate you.
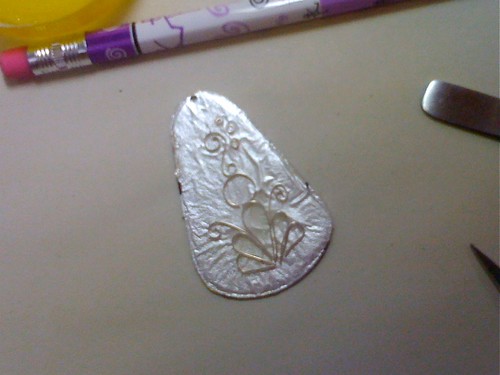
(here's my wires, finally and firmly attached. Whew.)
Step 5: The fun begins! Now, having chosen colors of enamel that please you and having "washed" them (as much as you can wash powdered glass frit) you sort of push them into place with a wet paintbrush that is approximately the same diameter as three eyelashes held together. You have to keep the enamel really wet, lest you are accused of "working lumpy." It happened to me. Don't let it happen to you. Having anything about yourself called lumpy publicly, even if it is the glass frit you're pushing around and not actually one of your body parts, is a little horrifying.
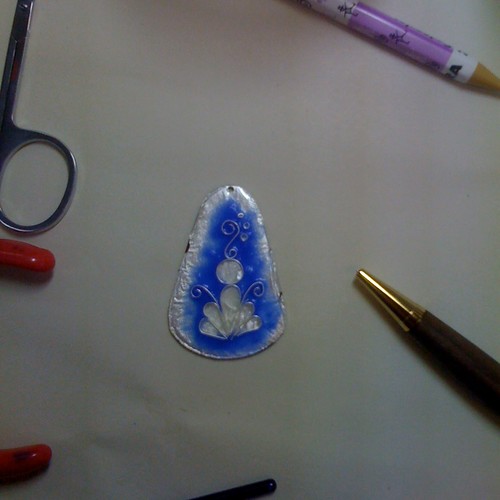
(Ooh. Better already.)
Step 6: Apply a not-lumpy layer of enamel all over the piece. Wet it, do a strange little tappy thing on the side of the piece to smooth it all out, and wait for it to dry. (You can greatly speed things up here by looking around to see if anyone is paying attention and then quickly blotting with a paper towel.) Once it's dry,you can then fire it. Firing things is fun and easy. It takes less than two minutes, usually, and you get to hold an amazing tool that looks like a cattle prod crossed with a taser crossed again with a fencing foil. And you use it to take glowing red metal out of a kiln right at eye level. Closed-toe shoes are essential here. Once you fire it hot enough, your piece is smooth as glass (um, because it is glass) and so pretty. You can then choose to grind down the surface and re-fire it, so that the wires are all the same height as the glass, or to just leave it as is, in relief (the 3-D kind, not the emotional kind).
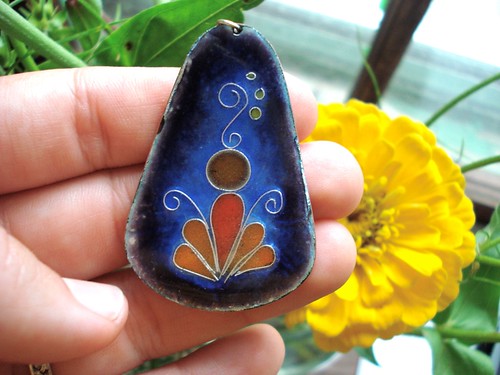
(There she is! No, this has nothing to do with NBC!)
I made tons of pretty things during the week, which are all posted on facebook and Flickr, with captions. Several Xmas presents were made but are not online, and most of the things I made i then sold at the student exhibit (gotta make some money for soapmaking, my next class!). There are even two pairs of earrings that I saved out to sell in my Etsy shop!

No comments:
Post a Comment